Between 2004 and 2005, the NYC Dept of Sanitation conducted a census of what was hiding in our trashcans and recycling bins: The New York City 2004-05 Residential and Street Basket Waste Characterization Study, or WCS. It was the first comprehensive look at our waste stream since a similar DSNY study conducted in 1989/1990.
If you’ve read my earlier posts, you’re probably aware that I kind of have a thing for trash.

While I love me some good scavenging action, there’s a lot more to our waste stream than finding drawers in it. Bear with me today; this trash talk has a good point.
A few years ago, I read an article somewhere about how our thrown-away Chinese takeout leftovers produce large amounts methane, a pretty feisty greenhouse gas, as they decompose in landfills. Well, more than just the leftovers… it turned out that just about any organic material (kitchen scraps, paper, yard waste, natural-fiber fabrics, etc.) in the ol’ landfill, when entombed under other crap, decomposes anaerobically (i.e. no oxygen present) and emits methane as part of that process.
 Vroom vroom!
Back to the 2004/2005 WCS. I was happy to see, among lots of interesting data points, a focus on organic waste. Apparently, the amount of organics in our fair city’s residential waste stream, if apprehended, could exceed one million tons of material per year. And that’s only counting kitchen scraps, yard trimmings, and compostable paper… and only, again, residential. If we also count paper material otherwise designated for recycling, a whopping 64% of our waste is organic.
More than half. Of the 64,000 tons* of stuff we place curbside. Per week. *According to 2004/2005 figures.
And a buttload of it is heading for the dump. Hello, methane!
The good news is that we regular folk can get crafty to address this problem, benefiting us individually and our ecosystem (and the DSNY, if you care). Fellow homesteaders, take heed.
]]>Composting is the art and science of managing organic waste’s decomposition, and it can be done just about anywhere, even on a small scale, e.g. in a cramped Brooklyn homesteader’s apartment. And, best of all, it results in black gold: compost, a soil-building, fertilizing, nutrient powerhouse that will make your plants jump for joy.
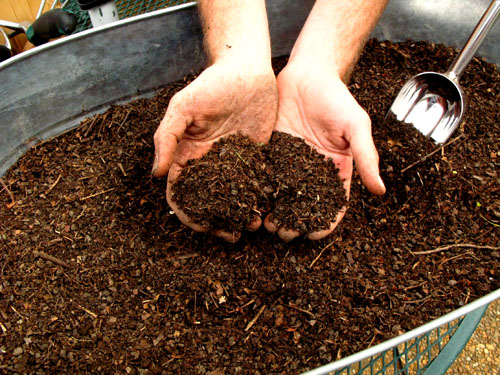
Over the years, I’ve learned about composting through research, but mostly through trial and error-ish. My earliest forays involved a big bucket on my roof where I left all of my kitchen scraps to rot. Luckily, it was a private roof, because, boy, did it smell. And, oh lord, the flies… But, sure enough, I ended up with usable compost that I didn’t have to buy. Now, with some more experience under my belt, I manage our compost heaps at Brooklyn Grange, maintain and contribute to my community garden’s composting box setup, and play the part of loving father to a hefty colony of compost worms in my apartment.
One of the best things about composting is that there are very few hard rules, if any, really; for every outspoken composting yokel out there, there’s a tried-and-true way to compost. (For reals: In the latest issue of Heirloom Gardener magazine, the Q&A expert says, “Two parts green to one part brown is said to be the perfect ratio”, while later in the issue, an article on composting stresses, “Always put more browns than greens in the compost pile.”) If you are a composting virgin, don’t let this deter you!
Given enough time, virtually all organics will decompose, unless expertly mummified or sunk in a peat bog. So, guidelines you’ll come across really only address specific symptoms or qualities of that decomposition process, rather than the ultimate effect. E.g.:
-Smell: if you have too many “greens” (high-nitrogen, usually fresh plant matter) over “browns” (high-carbon, dry and dead stuff like fall leaves, straw, or newspaper), or everything is too wet, or not aerated/turned enough, it can smell pretty bad.
-Timing: if you have basically only browns, or everything is too dry, or not aerated/turned enough, it can take forever to break down; nitrogen from greens is required for the various chemical and biological processes that break down browns.
-Vermin: if you don’t protect your outdoor setup or you add meat, expect raccoons or feral cats, or worse; if improperly managed, you may get lots of fruit flies.
Consider your situation. Do you garden? Do you have access to outdoor space (e.g. backyard or community garden)? Do you have a storage closet? Do you have a few dollars to spend?
Composting can be fun if you’re a geek like me, but unless you garden and can make use of your own black gold (or, maybe, are trying to woo someone who does), doing it yourself just might not be worth your time and energy. If you don’t compost, I won’t hate you forever. Luckily, you can, with little hassle, fight the good fight by saving and donating your organics to a local community garden, a farm like Brooklyn Grange, or organizations like the North Brooklyn Compost Project, the LES Ecology Center, or the Western Queens Compost Initiative.
If you can put that compost to some use yourself, you’ve got a few options!
Worms:
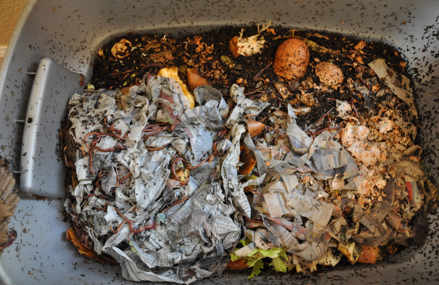
I wholeheartedly recommend that everybody keep a worm bin. Unless you really screw things up bad (which is pretty hard to do here), it’ll be fairly clean and odorless. It’s especially great for kids, if you’ve got them, who’ll dote almost disturbingly carefully over their new pets. You can buy or build a vermicomposting setup to keep in your home. I keep the system I inherited in my storage closet, but would gladly keep it in my bedroom if I weren’t blessed with the extra space… seriously, it’s that unobtrusive. The finished product, called castings, is full of nutrients and microorganisms and is just really awesome. Try to store any liquid that seeps out too (“tea”) which can be diluted and used as a potent foliar fertilizer. If you go the vermicomposting route, beware of extreme summer heat and winter freezes; try to keep your setup indoors.
Grubs:
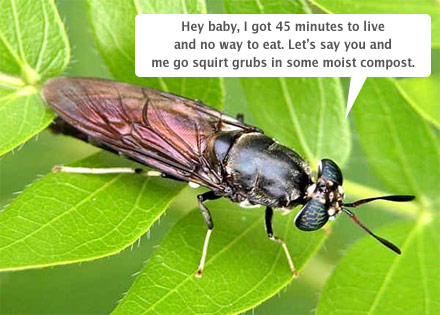
A more recent composting technique involving grubs, specifically the larvae of the black soldier fly, has taken the world by storm. According to its proponents, it’s a fast, clean, and sustainable way to process waste; the grubs are said to consume more voraciously, and, as flies, reproduce more quickly, than worms. I have not yet given grubs a try, but I’m definitely intrigued… and a bit horrified (a visitor to my farm introduced this concept as the “grub reactor”, and I haven’t been able to shake the sci-fi horror image). If you’re brave, read more here!
Tumbler:
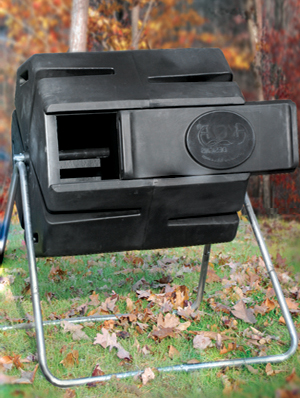
If worms and grubs give you the heeby-jeebies and you have some outdoor space to call your own, you can try a tumbler. They can be fairly expensive, but take up little space and if properly managed can yield finished compost faster than a static pile. I got one for my suburban mom for Christmas, and she’s gone nuts with it! In my opinion, a tumbler is more difficult to successfully make yourself than a worm bin, but with enough craftiness, anything’s possible. Just add brows and greens in whatever proportions you find work, keep moist, set in the sun, and turn or rotate often. I’ve seen claims from some tumbler manufacturers that one can expect finished compost in as little as a few weeks. Unfortunately, I have yet to see one live up to those expectations, but, again, they ultimately do work with enough time and care.
Box/Bin:
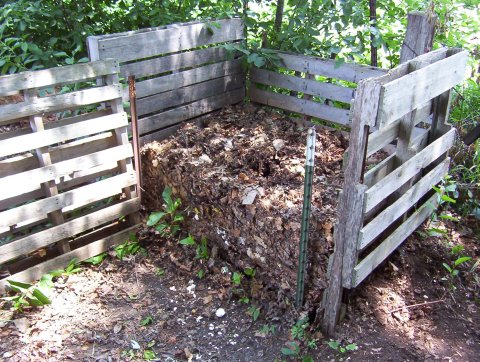
A composting box or bin is sort of like a tumbler in that it keeps everything contained, but there’s no turning mechanism included as part of the contraption. You’ll have to mux it all up with a pitchfork or shovel or compost turner. It’s managed pretty much like a heap, below. One upside to this setup is that it’s incredibly easy and inexpensive to make yourself… a few wood pallets nailed together can do the trick.
Heap:
(Here’s my friend Randee helping turn our compost at Brooklyn Grange.)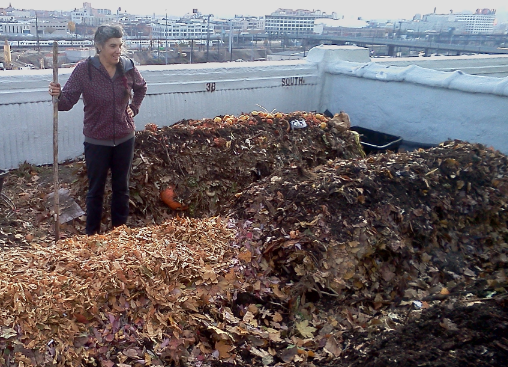
If you’ve got a yard and don’t mind a big pile of rotting stuff taking center stage, try making a plain ol’ compost pile. Layer greens and browns, keep sufficiently moistened, and turn often (pitchforks work so well). With ground contact, you’ll be inviting worms and other critters to join in, which is good, and with enough space you can process as much waste as you can generate. But it will likely take the longest of all methods, and since it’s out in the open, within view and smell of your neighbors, I’d suggest going heavy on the browns to minimize any odors.
No matter which kind of composting you try, here are some guidelines that I can get behind based on my own experience:
-Use a large tupperware or bucket for holding your compostables until you can add them to whatever. It’s easier than a trip each time you have some new waste, and you’ll be less likely to toss it in the trash. Don’t even think about spending $50 on a specialized bucket with odor-controlling carbon filters. I keep my bucket loosely covered and unrefrigerated in the kitchen and it never smells up the place. If you get fruit flies, close it shut.
-Smaller pieces break down faster than larger ones. Cut or rip or shred everything into bits.
-Smells can be usually be controlled by adding more browns to dry things up a bit.
-Mix stuff up as often as possible.
-Grease/oil (oxygen blockers), wax (ditto), human or pet feces (pathogens), diseased plants (ditto): DON’T add these things to your composting setup! I promise!
What to do with all of your finished compost? If you can, use it right away; top dress your containers, spread across your garden plot, or even give a tree on your street some love. Otherwise, it can be stored pretty darn well in burlap/coffee sacks (the ventilation keeps it from getting stinky, as it’ll still be alive in there). If storing outdoors, cover with a tarp to keep nutrients from leaching out in the rain.
Well… feeling trashy yet?
For some great NYC-specific composting resources, check out the NYC Compost Project hub.
Also, Compost Instructions is a wonderful resource for general info, FAQs, and DIY instructions.
If you’re considering vermicomposting, you’d be hard pressed to find a resource better than Red Worm Composting.
]]>
